You have already bought the gift, so do not buy the gift bag! We all have bags and ribbons around the house to make a personalized gift bag with supplies you already have. Whether you are giving the bride and groom a gift or are the bride and groom giving “thank you” gifts this is a great way to clean out some of the sacks you have around the house and make a nice gift presentation for free. Remember, you can transition this to other occasions and holidays.
You will need:
- Solid color bag with handles
- Card (used)
- Ribbon
- Glue
- Hole-punch
- Scissors
As you can see in the picture above, I used a paper bag from a local store. The bag can be colored or possibly plastic, but should be a solid color with handles in the style shown. If it has a logo on it indicating the store you received the bag from, but not the gift inside you will want to look for an image large enough to cover the logo. If the logo spans the majority of the bag…choose a different bag.
I am married, so, I have many “yeah, you’re getting married” cards in my repurposing card box. It does not have to be an engagement/bridal/wedding card just something appropriate. No matter how you really feel about the marriage or the couple, try to pick a nice picture of a flower or something pleasant…not a birthday cake, Christmas tree or a black cat from a Halloween card! If you have a great picture of the couple you may consider using that if you do not have an appropriate card. I would suggest placing a paper frame around the picture to give a finished appearance. Also, choose your image considering whether it will: cover the store logo and appear professional (store bought).
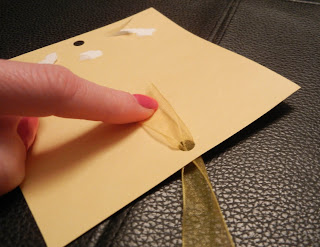
Cut the image you have chosen from the card. Punch centered holes in both sides of your image.
Choose a ribbon that color coordinates with your card. You want a ribbon that is about ½” to 1”. If your ribbon is too wide you will have trouble threading it through the holes and if it is too skinny it may look disproportionate if you are making a large gift sack like this one. Thread the ribbon through either side of the card cut-out.
Punch another hole at the top of the card cut-out. Thread the ribbons from the back side of the image through the front of the top hole. Slide the ribbons (still attached to the card) over the top of the bag. With a pencil mark the ribbon and the cut-out placement. Remove the ribbon and card. Place a swipe of glue over the marked area. Replace the cut-out and ribbon pressing them into the glue. Use glue that will hold your ribbon in place. A glue stick may not be strong enough to hold your ribbon. Once you have everything in place tie your bow at the top. *Note: if you do not have ample ribbon yardage it is not necessary to attach ribbon all the way around the bag. Just the front side is fine.
Voila! A personalized wedding gift bag.


No comments:
Post a Comment